
Hosting Static Websites with GitHub Pages
Thursday, April 24, 2014
This post is written for a Web Design Decal extra topic lecture. If you already
have experience with Git/GitHub, I suggest reading this extremely succinct explanation
of GitHub Pages. This post will start
from the very beginning.
1. Download Git or a Git Client
To set up, first download Git or a Git client. You have several options depending
on your familiarity with command line and your operating system.
Option A: GitHub for Windows
This application is for Windows users because Git tends to be a bit more difficult to set up on Windows computers than on other operating systems. It seems to be fairly user friendly from what I've seen.
This application is for Windows users because Git tends to be a bit more difficult to set up on Windows computers than on other operating systems. It seems to be fairly user friendly from what I've seen.
Option B: GitHub for Mac
This application is for Mac users that don't want to deal with command line. I highly recommend this for non-CS majors.
This application is for Mac users that don't want to deal with command line. I highly recommend this for non-CS majors.
Option C: Git + Command Line
If you are comfortable with command line, you might want to download Git and use command line instructions. I personally use this option in addition to a visualization GUI called Tower because I think the things you can do on GitHub for Windows/Mac are more limited than what you can do with command line. But if you mostly care about just deploying your website instead of using Git's version control features, then GitHub for Windows/Mac will satisfy all of your needs.
If you are comfortable with command line, you might want to download Git and use command line instructions. I personally use this option in addition to a visualization GUI called Tower because I think the things you can do on GitHub for Windows/Mac are more limited than what you can do with command line. But if you mostly care about just deploying your website instead of using Git's version control features, then GitHub for Windows/Mac will satisfy all of your needs.
2. Create GitHub Account
You will also need to go to the GitHub site
and create an account if you do not already have one. Once you create an account, you
will need to open your Git client if you are using GitHub for Windows/Mac and add
your account (in Preferences or Set Up).
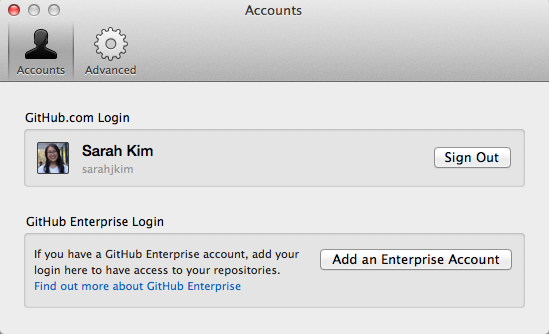
Mac: Meta webpage on local host versus webpage hosted on GitHub
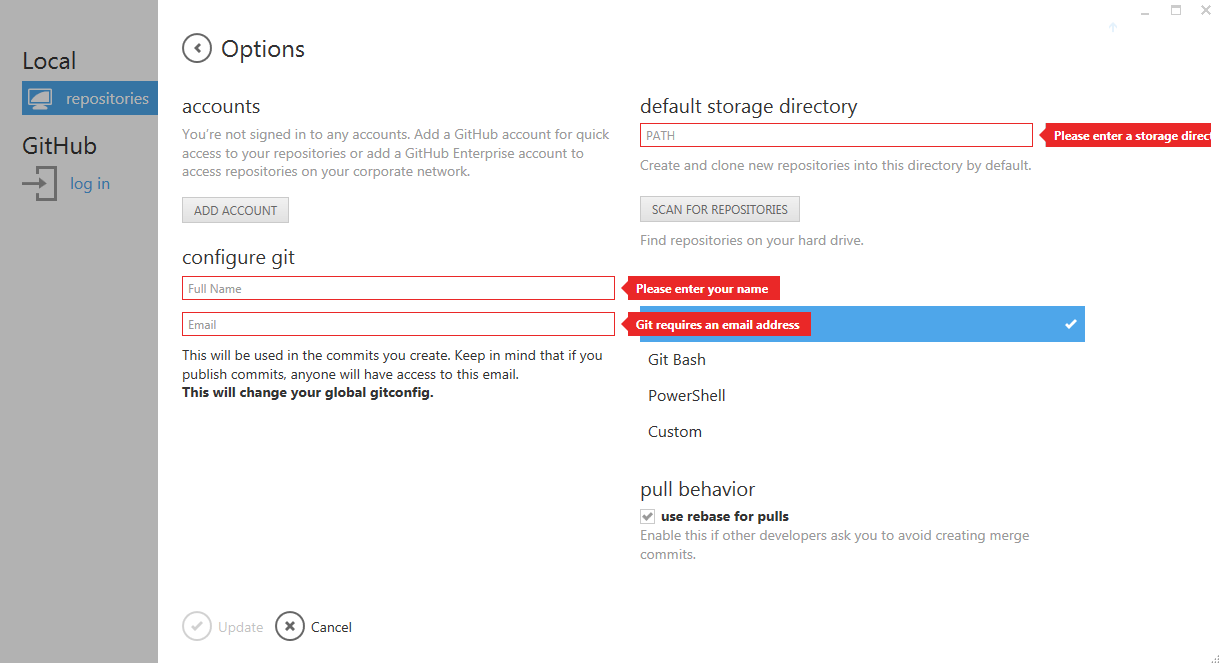
Windows: Link GitHub account to Git client
3. Quick Introduction to Website Hosting
You may be wondering how the files you work on in this class are different from the
websites you can access on the Internet at a domain name like www.google.com. One of
the major differences is that many of these sites have a backend, but another major
difference is that your files are located on your computer and are not accessible
to the public while other sites are hosted on servers.
So what exactly is website hosting? Well, just like you can open a HTML file on your
own computer and see a webpage, the concept of websites on the Internet is that other
people can open website files that are located on other computers and still see websites.
Basically, a website on the Internet is a publicly accessible file. If you changed some
of your computer settings to turn it into a server, your own computer could be a
website host.
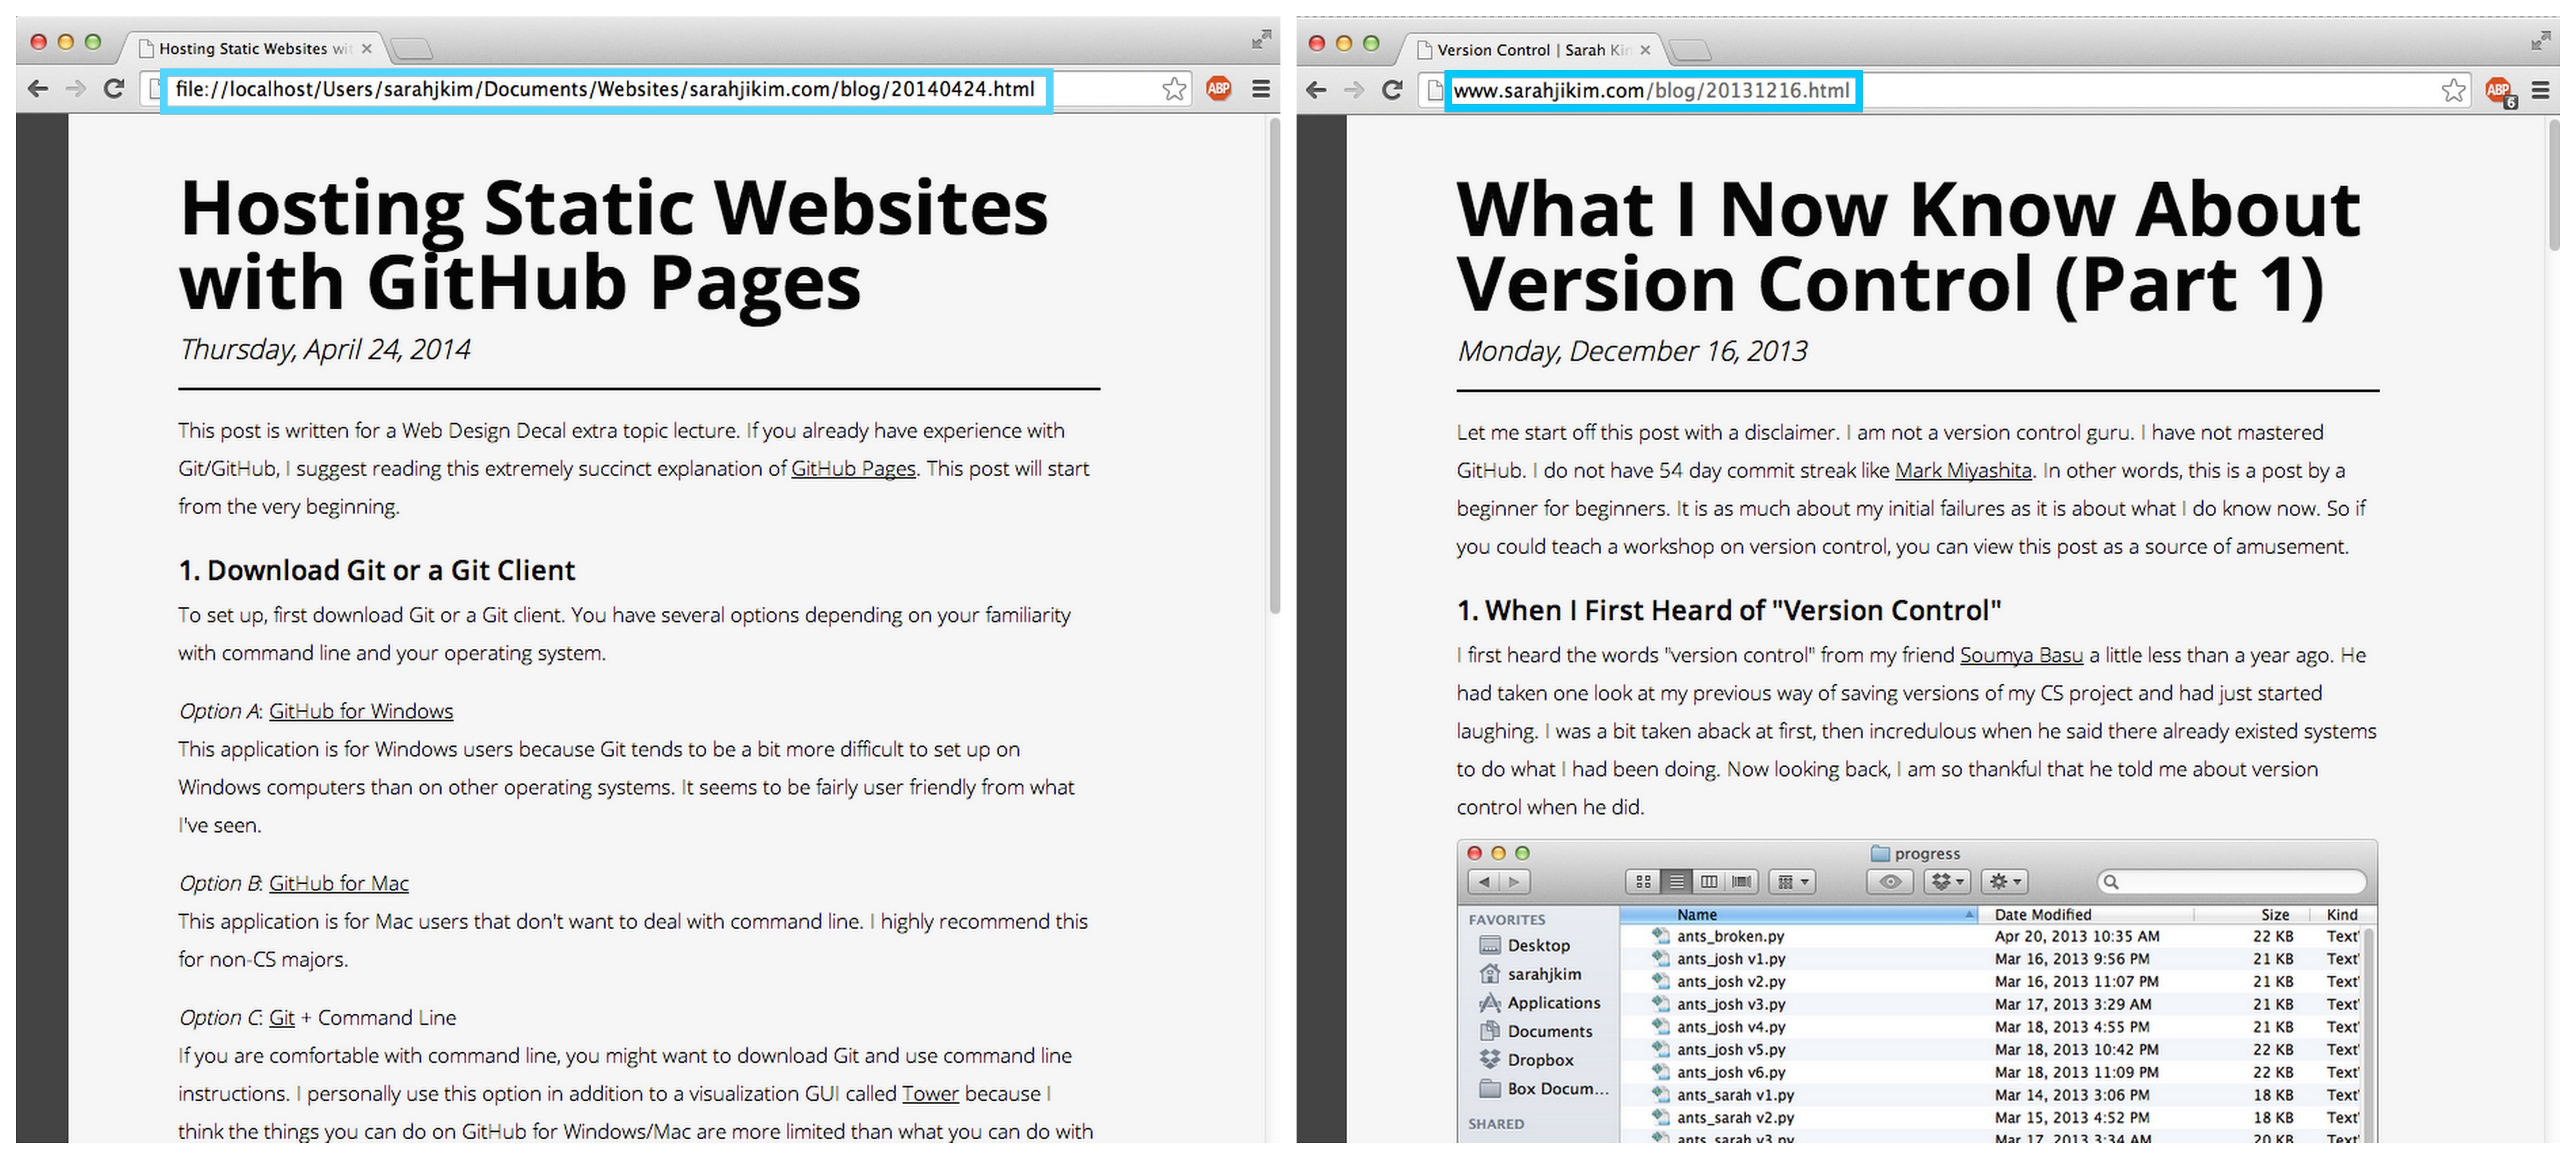
Meta webpage on local host versus webpage hosted on GitHub
But it is generally a bad idea to turn your own laptop into a permanent server (because you
still want to be able to use it normally like being able to turn it off and disconnect it
from the Internet while walking to class). That's where hosting services come into play.
These services have computers dedicated to staying on and allowing users from all
over the world to access their website files.
We're going to be using GitHub
because it has a free website hosting service. However, GitHub's primary purpose is
a host of all sorts of version controlled files and directories, not just HTML, CSS, and
JavaScript files, so we're going to have to learn a bit about version control in order
to properly deploy our static website.
4. Quick Introduction to Version Control
Version control systems are ways to keep track of changes to documents, computer
programs, and projects. Version control allows you to track changes to your files and
save previous iterations of your files. That way, you can work on multiple different versions
of your files simultaneously and revert unwanted changes.
Some aspects of version control are actually built into very commonly used applications.
Think of how Microsoft Word has the "Undo" command and how you can Revision History on
Google Drive documents. You don't need to know the specifics of how this all works, but
just know the following basic principles.
Git keeps track of everything that happens to folder and the files/subfolders in that
folder. Think of something along the lines of Time Machine
for just one directory. This group of files that you want to track changes to is called
a repository. In order to save a "snapshot" of files as they were at a specific time,
you need to commit changes to your files. Whenever you make a commit, Git saves all
committed files as they appeared at the time of the commit. That way, when you change
files later on, you can see what they used to look like by viewing previous commits.
These committed changes are only in your local directory in a hidden .git file. You can,
however, push your commits to an external site like GitHub. Repositories that you
place into online sites like GitHub and Bitbucket
are called remotes.
5. Setting Up Remote Repository
Create a new repository on your GitHub account. It should be called username.github.io.
You should replace "username" with whatever you username is. It should be a public
repository, and you don't have to worry about README or .gitignore files right now.
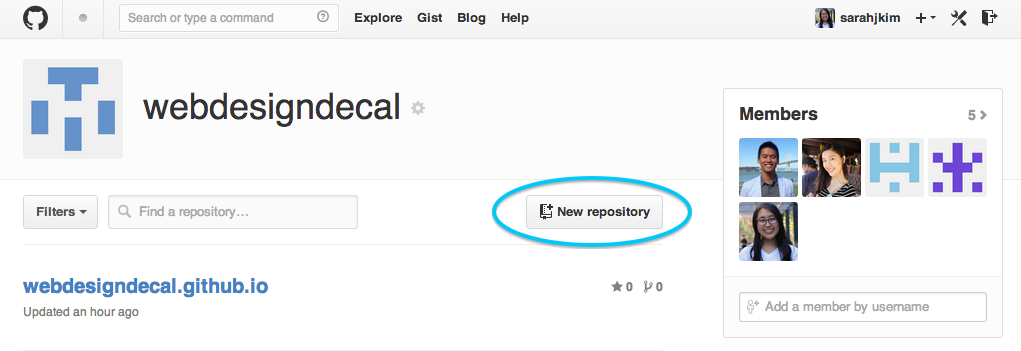
Click the new repository button to create a new remote repo
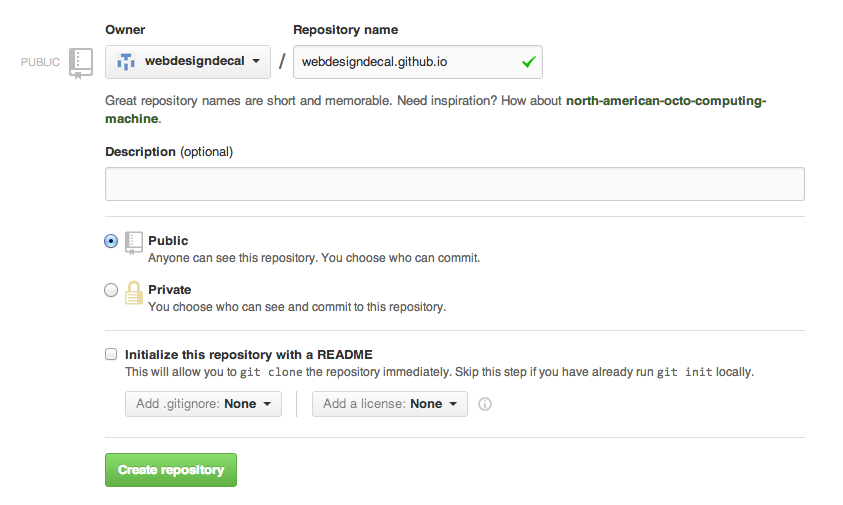
These are the settings for how you should initialize your repo
Now that you've create your remote repository, your next step depends on whether you are
using GitHub for Windows/Mac or the command line. If you are using GitHub for Windows/Mac,
click the "Set up in Desktop" button connect your remote to a local repository. If you
are on command line, pay attention to the command line that detail how to create a
new repository and how to add a remote to push from an existing repository.
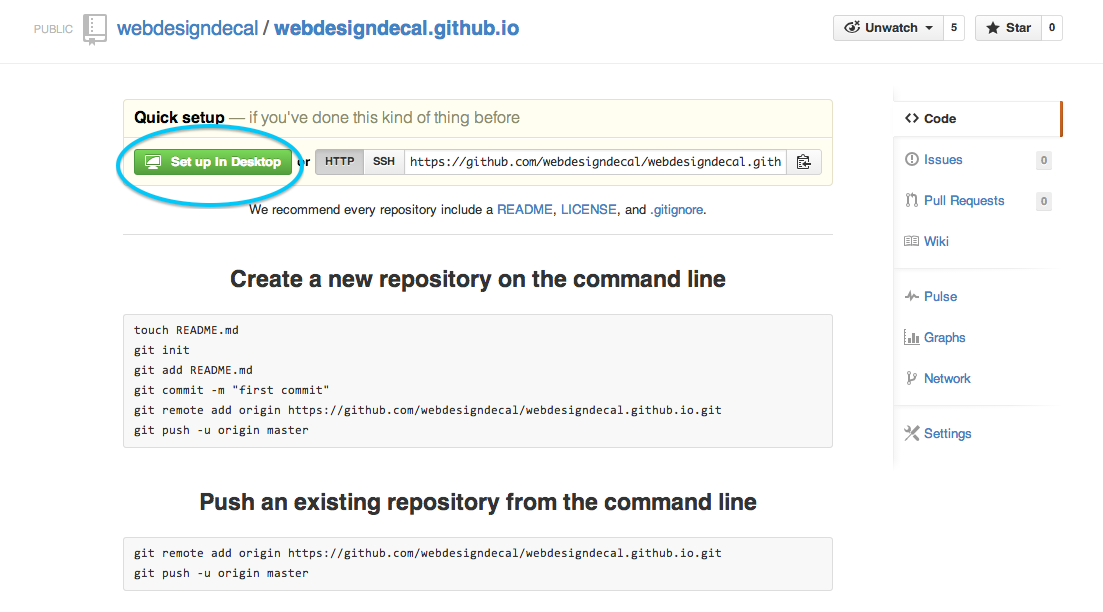
Your next step varies according to your Git client/command line
6. Setting Up Local Repository
If you are using command line, you should switch to this post here
to learn how to initialize your repo, add files, and commit. You should use the command
line instructions specified by GitHub after creating your repository. Once you have
committed files like "index.html" to your local repository, you should add your GitHub
remote and push your commits to your remote. You can rejoin this post at step #7.
The rest of this post is for those using the GitHub for Windows/Mac client. You should
see an empty repository on your Git client window.
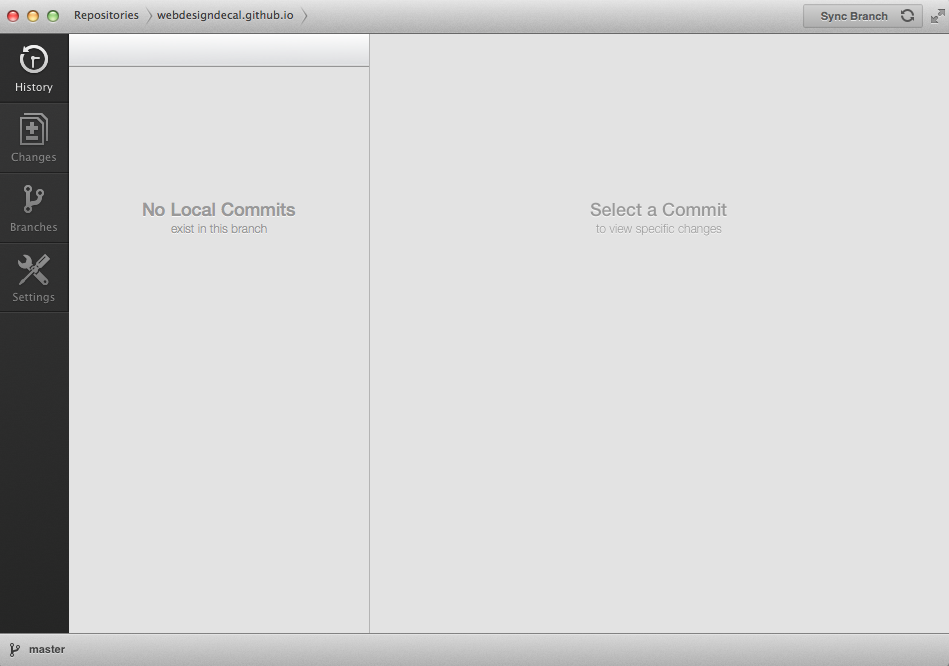
Mac: No local commits at the beginning
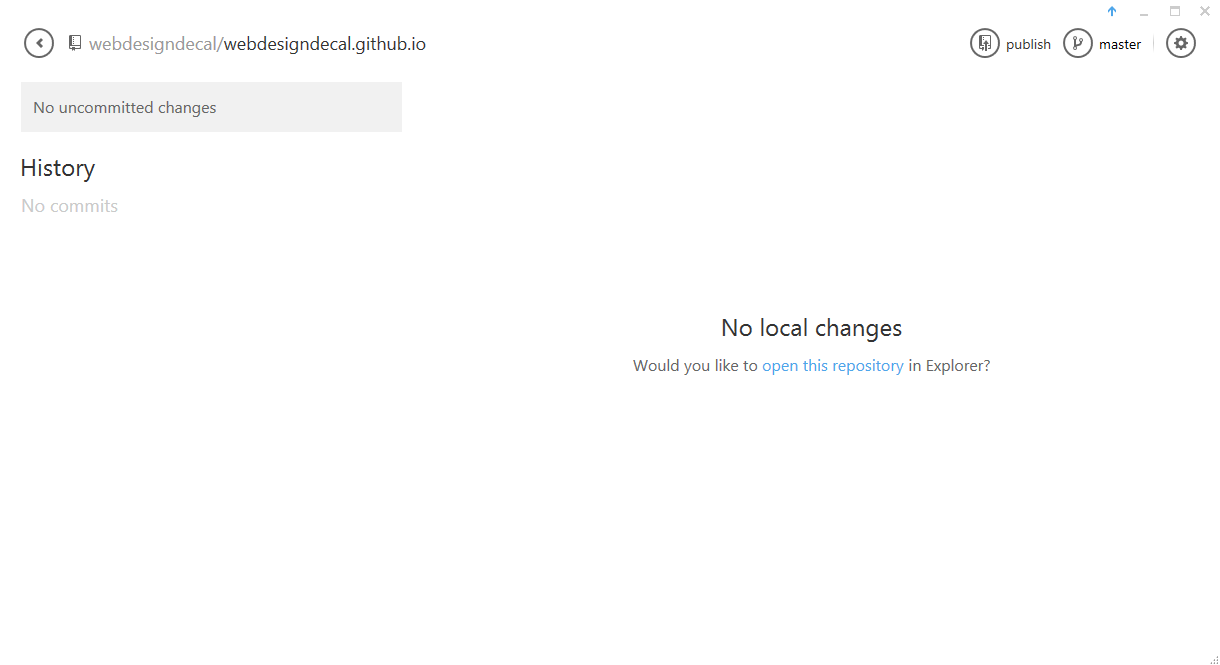
Windows: No local commits at the beginning
Next, you should add an index.html file. This index file will be the home page of your
site so that when you enter "www.username.github.io," you will see the webpage
specified by your index. For this demo, I won't be creating a complicated website. My
index.html file is just a simple "Hello World" text. If you'd like to see a more
complex website with CSS & JS files and images, you can check my personal website's
GitHub repository.

I added an index.html file to the directory holding my Git repository.
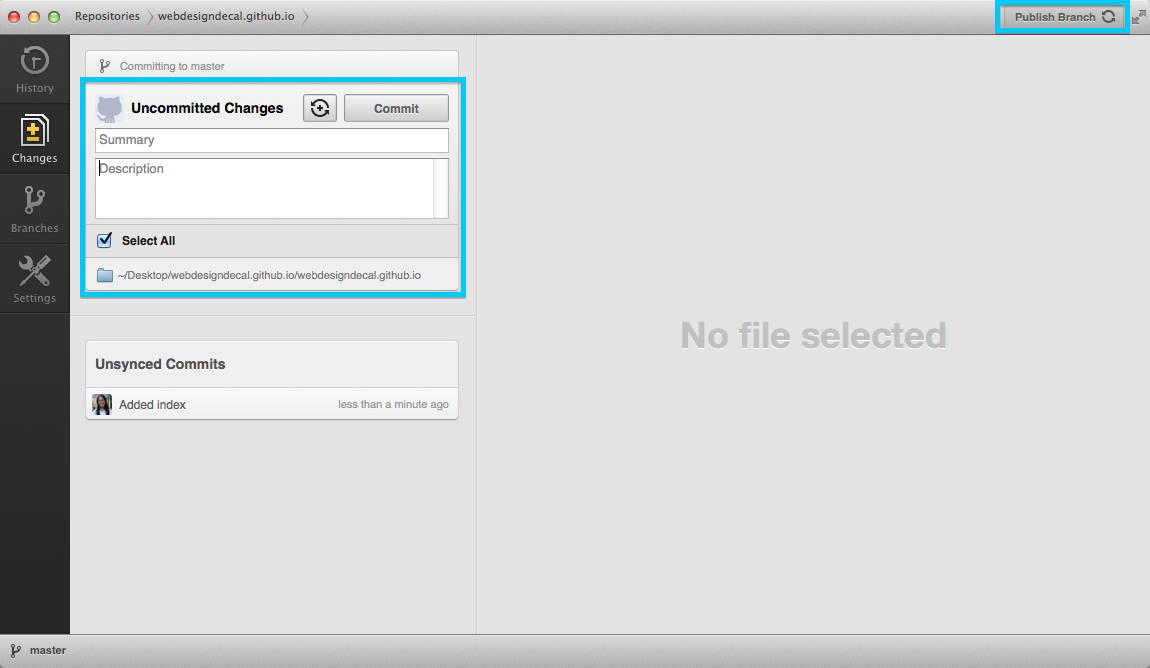
If you go to the changes tab of your Git client, you should see a space to make
a commit. This commit will take a snapshot of the files in your local repository. Make
sure to use a descriptive commit summary (and optional description). Once you have committed,
you should "Publish Branch" then "Sync Branch." Publishing and syncing your branch
in the Git client is analogous to a Git push/pull. Syncing will move commits from
your local repository to the remote repository and vice versa.
Mac: I committed my index file.
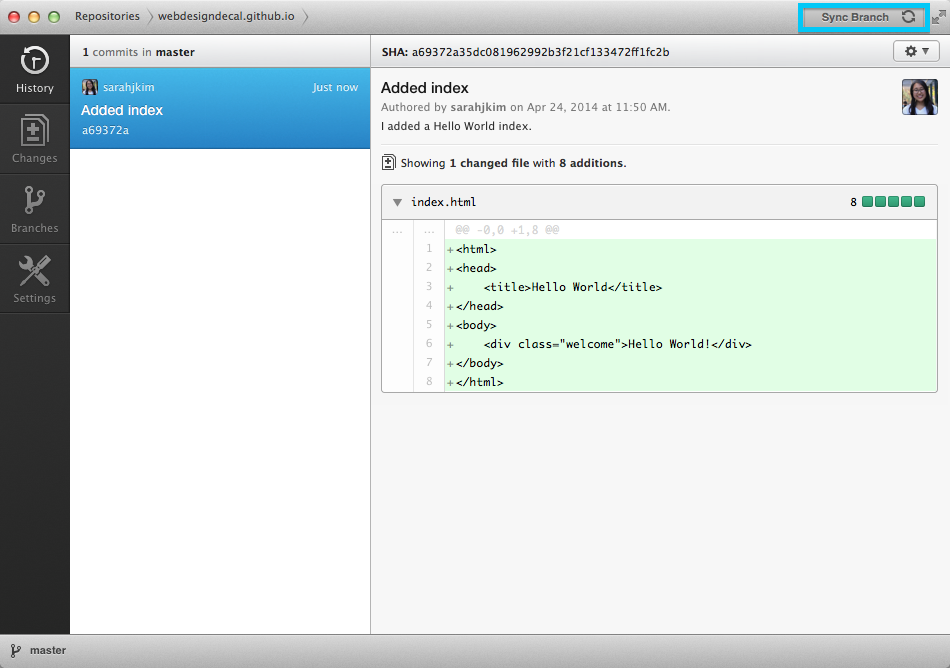
Mac: These are the details of the index file I committed.
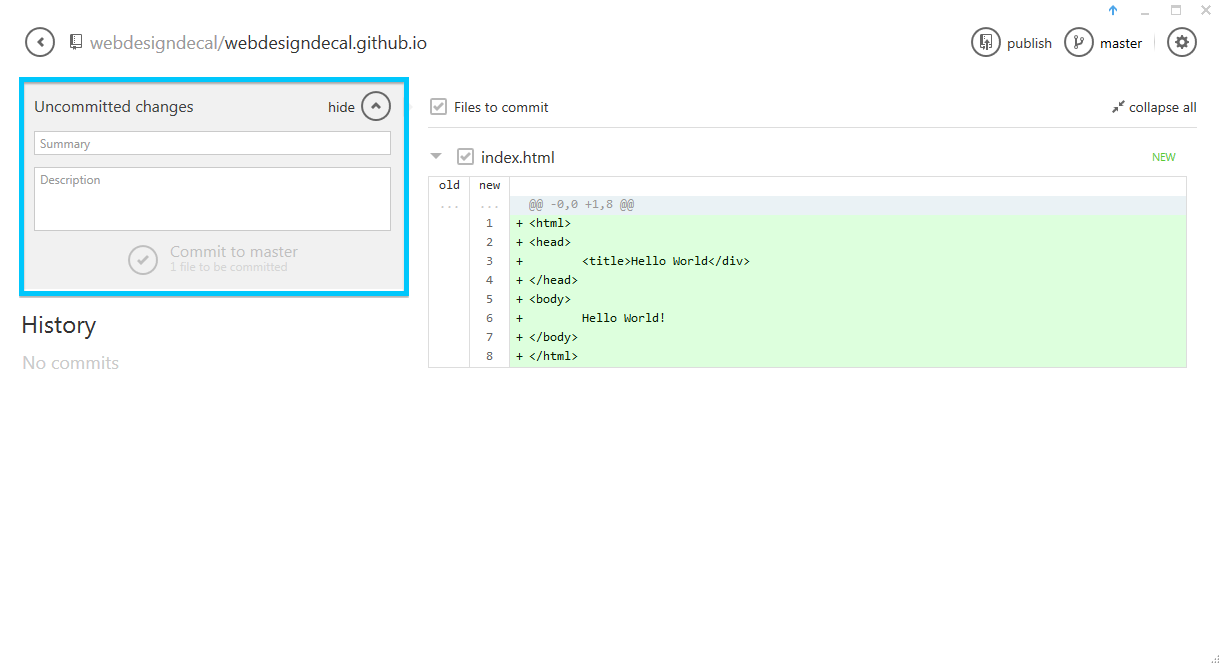
Windows: Uncommited changes
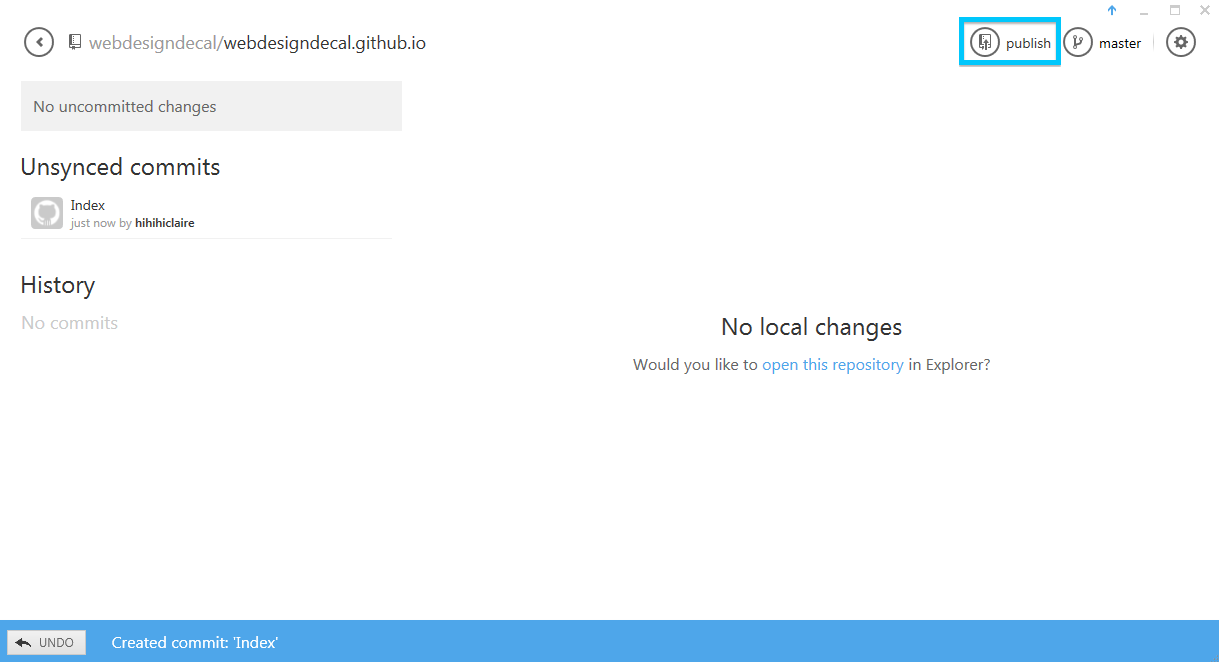
Windows: I committed my index file.
7. View Your Website
If you check your GitHub repository, you should see that commits you synced from
your Git client or pushed from your local Git repository have appeared in the remote
repository.
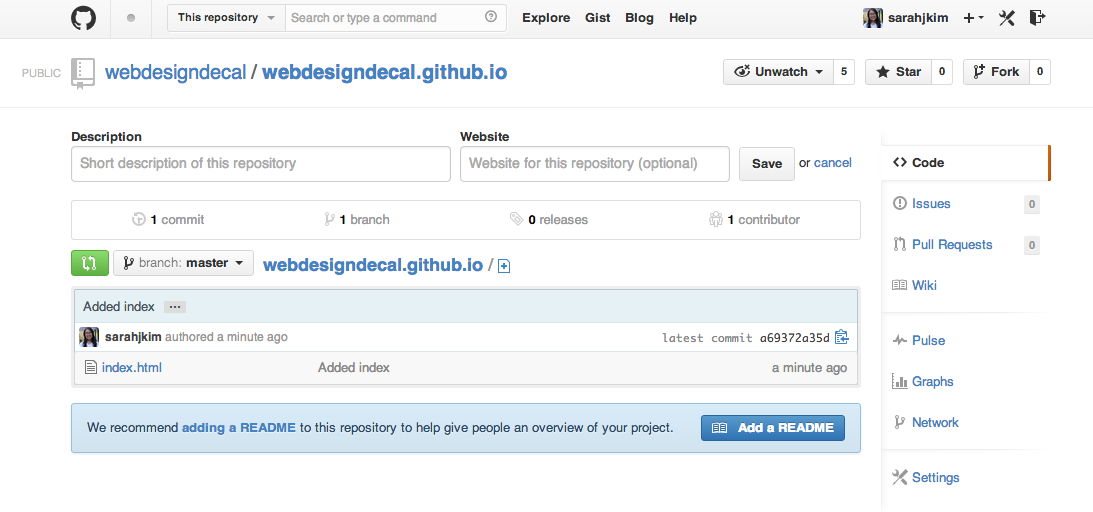
Commits now on GitHub
If you go to username.github.io, you should see your site! You may initially
get a "Page Not Found" error because it takes a while for GitHub Pages to set up
your site. But eventually, you should see your index page! Congratulations on deploying
your static site!

Your site has been deployed!
8. Using a Custom Domain Name
Perhaps you don't want your domain to be username.github.io. Maybe you want
evencoolerusername.com or another custom domain name. You can use a custom
domain name with GitHub user or organization pages (like you one you just created).
I suggest searching for cool domain names using Domainr.
You can "purchase" a domain name for usually less than $10 using domain name registration
services like Namecheap. I personally
use Namecheap, though there are multiple other alternatives.

My domain name registration on Namecheap
To connected my domain to sarahjkim.github.io, I have a CNAME redirect in my Namecheap
Host Management section. I also have an analogous CNAME file in my GitHub repository.
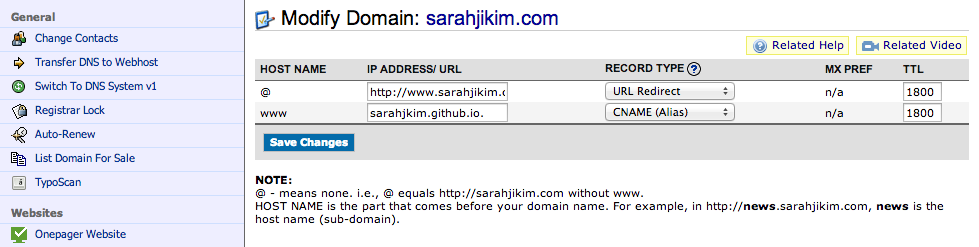
CNAME in my Namecheap Host Management
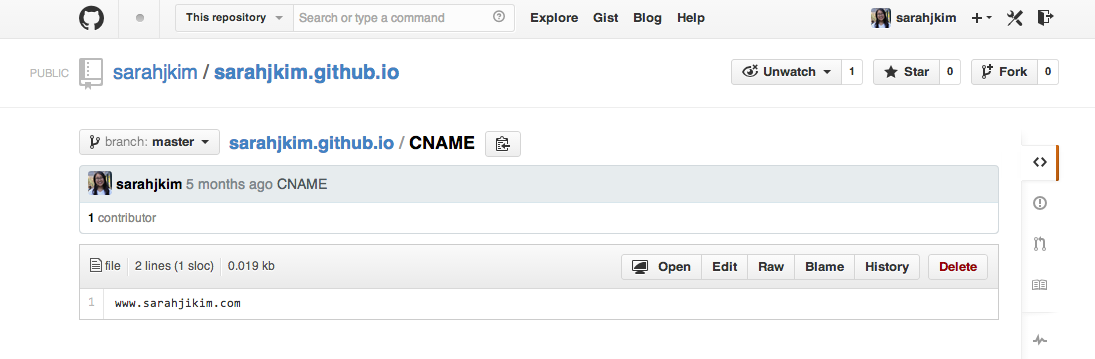
CNAME in the GitHub repository
These CNAME files allow me to use the custom domain name sarahjikim.com. If you go
to sarahjkim.github.io, it will redirect you to sarahjikim.com. And now you have a
very cool personalized website!